How to Install Blog on a Server Script and Hostingan Own Domain

My previous post about how to protect your website from virus attacks, today I explain how to install a blog script. Want to have a blog? there are many free blog providers like blogspot or wordpress, posting the day I will explain how to install WordPress on a server script and hostingan own domain, there are two ways:

If you have hostingan Fantastico features in cpanelnya, live iconnya click and script installed directly on the server with several sets of standards.

Second, if it does not provide features servermu Fantastico, the WordPress script can be downloaded from WordPress.org and then after extracting files, stored on your hard drive filesnya. (Step 1)

Step 2, then create a database and users with a way:
  • Login to cpanel hostingan, click the menu Mysql
  • Create a new database on the option "Create New Database", for example, given the "wordpressblog", click the "create".
  • If no user data to be used as a user in wordpress blog, create a new user name by clicking the option "Add New User" and create paswordnya for the user.
In the section "Add the following privileges to the database", Setting Global Privileges for the username and database by checking the option "All", so that users can tersebu t have access to all the changes in managing the database.
  • Click GO
Note To field is usually the server name use "localhost"

Step 3, then locate the file wp-config-sample.php in WP from WordPress.org script and rename this (renamed) into wp-config.php, open the file with a text editor and edit the code like this:

DB_USER and DB_PASSWORD is a username and password created above was
DB_HOST usually filled with localhost, but can also vary depending on a given server hosting. Click Save File afterward.

Step 4, upload all the files have been extracted from WordPress.org hostingan to the server using FTP Client, can be placed in the root directory (URL access to www.namadomainmu.com) or in the subdirectory (URL www.namadomainmu.com / blogs /)

Step 5, Run Install Script
  • the web broser, write www.youdomain.com/blogs /install.php
  • The field will appear like this:
  • Install WP
  • Fill the column with the weblog title and email use.
  • then there are some guidelines that must be filled

Finish

# To go to the admin panel, through www.youdomain.com/wp-admin
# Fill in with the username in the password that was created earlier didatabase.
How To Prevent Viruses On The Website

My previous post on how to how to create database in hosting , today I will give an explanation how to prevent viruses on the website.

Lately quite a lot of websites that display changes, errors, and displays the login page to the bank, ebay, paypal (phishing) due to a virus that infects a computer smart enough.

When you visit an infected site, your PC is infected. Your computer may be infected to communicate with other computers. Spyware thereby disable FTP access, send the information to the Internet. Your username password and then used to hack your own site by adding the script to your web files. Your site later became the site of malware and malware spreading further. It may even diblacklist by Google and other sites.

The incident most often occurs when you visit porn sites, advertisements, warez, and others are dangerous. The most frequent cafes where virus.
In this article discussed how to secure websites from virus attacks which alter the look of websites, upload bank pages, send spam, phishing and more.
All events caused from windows users who are not careful in playing on the internet:

The steps that need to be considered to secure your websites from the virus:

1. Clear cache and cookies from your browser.

Each finished using the Internet, do the deletion of information browsing in the browser, can be done following steps:

Firefox: Tools - Clear private data
Internet Explorer: Tools - Options - Clear caches, clear cookies, clear offline data

2. Replace all forms of good user password cpanel, email, ftp, etc..


Piracy user and password information in your computer by a virus will cause this information is spread from computer to computer. Of the computers that are already infected will do login and upload new data to the server your websites. To overcome this done quickly replacing the password-password above.

3. To email software, replace Outlook / Outlook express to Thunderbird.

Outlook has since used the windows are known as the storehouse of the virus.
Without realizing it, the virus infected Outlook to send spam emails to Internet users using SMTP server facilities and addressbook. For security, you should immediately switch to thunderbird. can be downloaded at www.mozilla.org/thunderbird/

4. For CMS user joomla

Avoid using components and modules that upload files like gallery.
Joomla component expose at least secure because it often is used for uploading the page bank, paypal, etc.

Add security to user Registration, contact form with captcha, guestbooks, etc.


5. Contact-us form or email sending form.
Add a captcha security code in this form. captcha is a security code is an image that must be entered each time to submit.
Captcha will perform authentic whether to submit a human or machine.

http://en.wikipedia.org/wiki/Captcha

6. Antivirus updates to the latest database.
Antivirus does not guarantee the virus can be detected and eliminated. Diligently doing enough to help ward off updates of new virus.
Recommended for use kaspersky antivirus can be downloaded at www.kaspersky.com.

7. Upgrade your web script periodically.

For you who do the installation script / software like joomla, wordpress etc through fantastico in cpanel, fantastico immediately upgrade from, your script will be automatically upgraded to the new version.

To you who installed manually (not from fantastico), you should download / download from the official site, and do the upgrade according to the instructions from where you download.

Upgrade will help eliminate security bugs, but not entirely able to close the security weaknesses of the script used.

8. Avoid using public computers such as internet cafe to log into the server.


Computers are used together, are most at risk from data security of your data.
Results with the user login and password that has very likely saved and used for purposes that are not expected.
Sometimes there are users who menjahili kompter cafe by placing software to track each user typing a password.

9. BackUp!

Perform backup your database of websites and regularly. backup activities help restore web pages and data that has been attacked by a virus. Make a backup of your upload if you have been attacked websites like this virus.
How To Create a Database in The Hosting

When the install CMS (Content Management System) is required to make a database on the server but also direct install process, for example just wordpress where we have to create a database on the server. The following steps create a database through the Hosting Control Panel:
  • Login to Cpanel Hosting ex. http://www.yourdomain.com/cpanel
  • Find and click MySQL Databases icon menu, as shown:


  • New database, fill in the name of thedatabase would be made and click on "Create Database"


  • In the Current User, enter the name of the user name and password, then click "Create User". Remember user name and password, because the contents will be required to website database configuration.
  • In the Add user to Your Databases, connect between the user and the database is just created, then click the "Add User to Database" > click "All Privileges" > click ‘Make changes’
  • The new database has been made. 
Reffrensi :  http://www.gembong.web.id
Windows 7 Has Been Available in Indonesi


Windows 7 to reap praise from many in Beta and Release Candidate was released by Microsoft. Thursday, October 22, 2009, Microsoft will officially publish this latest operating system in the world, including in Indonesia.

Mention of Windows Vista in writing about Windows 7 be a strange thing. As is well known Vista was considered as Microsoft's operating system is 'less successful', then mention Vista as if to remind the lack of Vista.

But there was no denying it, Windows 7 is the successor to Windows Vista. And like Vista, 7 adopted Aero display. Of course, in Windows 7, Microsoft added a few things on the Aero.

On the surface, the display windows Aero is a 'glittering'. That is, the look of Windows is trying to replicate the look and shiny transparent glass.

But behind the 'glow' that, Aero includes behavior on windows operating system and also some functions around the user interface.

Aero Peek

If noted, the bottom right corner of Windows 7 will see a box that was almost hidden. Box 'glass' is Aero Peek.

To Aero Peek is a peek Desktop Windows without shrink (minimize) the application window that are overlapping. If the user directs the mouse pointer over the Aero Peek, the application window will change the Desktop transparent and would be visible.

Then, for what surface peek Desktop? In Windows 7 Microsoft remove the Sidebar, so that all the gadgets, if you want to use it-be installed on the surface of the Desktop. Well, Aero Peek is a quick way to peek at the gadget itself.

But do not try clicking on one of the gadget when peeked at the Aero Peek. Immediately when the mouse pointer moves out of the glass box, which was the application window will re-appear transparent.

(Note: To minimize all open applications and windows desktop surface, use the shortcut of Windows + D)

Aero Snap


If Aero Peek may not be much use, Aero Snap vice versa. detikINET assume this function is one of the most useful addition.

Its function is simple: drag (drag and drop) an application window to stick to the edge of the screen (left or right) and he will immediately change the size to fill half the screen. This is obviously useful when users need to open a two-screen applications at the same time: just drag each window to the left and right edge of the screen.

How to maximize the size of the window full screen? Simply drag the window to the edge of the screen and 'snap' of the application window will fill the screen.

(Note: shaking the application window can be used to 'drive' the application window other than being shaken. This feature is called Aero Shake)

Aero Thumbnails


Want to know what's going on in one application window without opening the window? Thumbnails Microsoft provides that will appear when the pointer is above the application icon in the Taskbar.

Display that appears in the 'small window' that will show the real condition of an application. For example, if in one of the windows were open web pages rather heavy users get a peek at what the page is fully open or not with this function.

If the mouse pointer is above the 'small window', then the application window in question would appear on the screen while the other window will become transparent.

Just like Aero Peek, if the pointer moves out of the area of the thumbnails will display back to the active window. In practice, this behavior can be annoying for users 'shocked' thought the application window is moved.

Themes


Themes-package that includes desktop display window color, image wallpapers, screensavers to sound-system was back. This time, users can share their Themes are created with ease.

One of the highlights of the Themes settings is the option to use some images as well as Wallpaper. Users can choose how long the images are rotated, ranging from 10 seconds to several hours.

The function named 'Slideshow Wallpaper' is useful for those who are often bored with the look of its desktop surface. Wallpaper changing effects even at fairly indulgent eye.

The many style 'glass' on Aero in Windows 7 was given the impression of its own. The impression will be more transparent to the user feels this operating system, as if each application window is a window made of glass (detik)
Labels: 0 comments | edit post
Free Download 10 script
I offer the following free scripts for you, manually install the way I have included in the scriptnya so please try!!

1
Script Website Matrix 3x3 Level new
bonus1
2
Script Website MLM 2 Level new
bonus1
3
Script Website Support Binary 2 Kaki Kanan Kiri new
bonus1
4
Script Website Random Reseller new
bonus1
5
Script Website PTC (Pay Per Klik) Unik new
bonus1
6
Script Website Matrix 3x9 Level new
bonus1
7
Script Website Iklan nxn Multi Level new
bonus1
8
Script Website  SMUO v.2 new
bonus1
9
Script Website Bisnis Direct And Random Reseller new
bonus1
10
Script Website Bisnis  nx3 Level new
bonus1
Having Hosting at Personal Computer With XAMPP
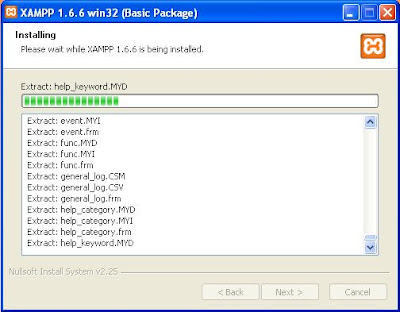
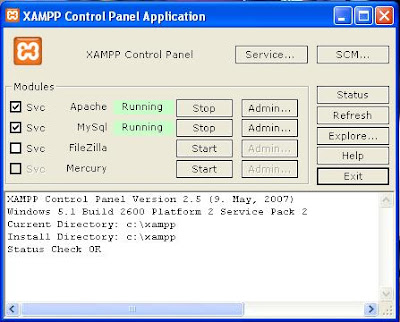
Want to have a hosting personal computer and download the script in a variety of personal computer without having to bother spending money to buy hosting? the solution is to use a software hosting. There are many local hosting software is one of XAMPP.

XAMPP is the most comprehensive software to provide web server, consisting of PHP XAMPP, Apache, and MYSQL, which three things above are the basic components for making the website the most widely used, PHP is a popular programming language often used in making websites, and Apache as the web server, and MySQL as a database to handle the transaction website.
Before using XAMPP, as usual when using the software must be installed first, the following process:
1. Dowload software of the member's area www.skripmurah.com + cracknya

2. After the download xampp, run the program xamp tsb.

Double-click or right click  Run.

Klik Ok.

Klik Next.

Klik Next.

Select Install Apache as service and Install MySQL as service, if the FileZilla FTP server to be installed as well as service selected, too. Then click Install
.

After the installation is complete, the following message appears:


Klik Finish,

Klik Ok.

Click Yes, if you wanted to run the XAMPP Control Panel.
XAMPP 1.6.6 installation is completed.
Display XAMPP Control Panel.

Settings on the control panel is simple enough. In this section there are sections Svc without check, it was a sign of the application service is not installed on the windows. In order for Service installed on Windows Services, click on the Svc.
To start / stop service live click on the Start / Stop.
If you want to do administration, click on the Admin button. is a web base for the Apache (web server), is mysql (database) and FileZilla (ftp server) and Mercury (SMTP mail server) based client software.
To enter the system files from xampp, click on the Explore button.
Following the administration web interface on Xampp.

If we want the control panel of xampp as a service in Windows, click on the Service button on the control panel of Xampp.

3. After the installation is complete, you can access the XAMPP control panel from the Start Menu> Programs> XAMPP XAMPP or via a shortcut on your computer desktop. Make sure the status of the Apache and MySQL already 'Running'. If the status of Apache and MySQL have not Running, click the Start button on the right of the Apache and MySQL.

4. For the initial tests, open your browser (Internet Explorer, Mozilla Firefox, Netscape Navigator, etc.), then type in the address bar http://localhost/. If Apache is running normally, the browser will respond to your request and will display the page containing congratulations that Apache already installed or in the form of writing 'It Works'. This test is to test and indicate Apache Apache can walk normally.

5. For testing the PHP module was able to walk integrated with your Apache, in the Address Bar type http://localhost/index.php. If the PHP module has worked well with Apache, the browser will display a table view with the title phpinfo () and the contents of the specification that you are using PHP. This PHP module you must first activate if you want to use PHP scripts on your website.

6.Open your moziila/interner exploler, write The Address Bar type http://localhost/phpmyadmin/. If the MySQL database server has been running well, the browser will display the PHPMyAdmin, MySQL control panel with a web-based interface. The first time, you will directly enter into the conrol panel PHPMyAdmin with root privileges. Root is the user with full access rights to the database (on Windows, this kind of access rights known as the administrator and the day-to-day known as the Admin). It is strongly recommended you secure access to PHPMyAdmin this by giving a password to access PHPMyAdmin, especially for the root user. Also recommended, does not give full access rights to users other than root or for other security reasons, you can give full access rights on the root level as any other user, but you must secure and treat it as the root user because the access rights he has. For other users, you can provide limited access rights to another user according to your policy as an administrator.

Just note also, MySQL initially only be accessed through the MySQL prompt on the console (in Windows known as the Command Prompt). For beginners who are less familiar with the operations console and the syntax of the SQL query that is used in MySQL, PHPMyAdmin will be very helpful. For any professional database administrators, PHPMyAdmin was also greatly assist their duties, especially in systems management processes, setting user permissions, database security settings, and so forth. Now, the MySQL prompt more frequently used in the maintenance and control of crash conditions and circumstances are very minimal (or impaired network is not available monitors and disturbed systems that prompt only be accessed remotely).

7. If you've finished installing XAMPP in C:, then $ PATH_INSTALASI \ xampp \ htdocs read into C: \ xampp \ htdocs. if you have a website script can be tested using this software, before the script is installed in the actual hosting. Do I make a new folder in C: \ xampp \ htdocs and give your name at will, for example mlm. Then Put your script in the file C: \ xampp \ htdocs \ mlm.

8. Follow the instructions for how to install the script, because each script how to install it differently.

9. If you've completed the install it, open your browser (Internet Explorer, Mozilla Firefox, Netscape Navigator, etc.), then type in the Address bar http://localhost/mlm

10. So Be your website. For editing your web site can use Dreamweafer or frontpage.
NB: If you request data Script Database then use database below. List of User and Password in XAMPP: The following list of user and password on xampp
1) For the MySQL database:
Database User: root
Password: (without the password blank alias ^_^!)

2) FileZilla FTP:
User for a client who has 2 pieces created by default
User: newuser
Password: wampp
and
User: anonymous
Password: some@mail.net

3) Mercury (Mail & POP3 Server):
3 users have the default is:
Postmaster: postmaster (postmaster @ localhost)
Administrator: Admin (admin @ localhost)
and
Testuser: newuser
Password: wampp

Hopefully the above explanation can add to your knowledge a bit. To get the script examples can be obtained at the member's area www.skripmurah.com

BY. Bagus
Make a Google Mail

Gmail is one of the email service provided free by GOOGLE (www.google.com). First issued to load the e-mail data is about 1 GB. After observing Kapanpuns proved its capacity to 6902 MB free. So you do not need to delete emails. You simply track in the search box provided. For tips on making please read the steps how to create G-mail address below ...

How to make email at Gmail.com :

Open your browser and go to the website of http://www.gmail.com. Start page will appear as the Gmail website shown in the picture below.


To get started create a new email, simply click the option you 'Sign up for Gmail' and will open the page "Create a Google Account - Gmail '. You can choose your language options to the right of "Change Language". Whenever Here's use English, you also can select the language Indonesia.

 
Fill box stuffing 'First name', 'Last name' and 'Desired Login Name' to this email address, you can check the availability of addresses (check availability!) That you want, whether e-mail address of your choice has some use or not (eg, whenever's use to sobatkp belom email address is used). Then enter the password and confirmation password, (for security passkey to select strong or green color to full). Security Question Enter your secondary email, Location (select Indonesia, normally this option is selected by default ', Type the characters you see on the screen in Word verification field. Next Therms of service if you want to read it please , but if you do not understand? roll it until the box down. once you are sure the data you enter is correct, please click the button I accept Create my account


If there are no errors, will appear a new page 'introduction to Gmail'. click I'm ready - show me my account on the right side make layar.


 Next, will open a new page again. This page E-mail your actual Gmail. Usually there will be a notification email from the 'Gmail Team' that your mail account is active and notification services they provide.


Congratulations, you have to have their own free email address. If There's criticism, suggestions, praise, or curse. Please write in the comments!
Labels: 0 comments | edit post
  • TRANSLATE